Living in a large urban centre in a small apartment just one level off of the ground has its challenges for astronomy. First of all, I don’t have a garage or other place I can conveniently store my equipment; many astronomers I know have a space set up in a garage or shed where they can keep their gear at close to outdoor temperature all year. No such luck here. Second, my “at home” viewing area is a concrete balcony that is, I suppose, about 6 square meters at the most. It projects out to the west, which means I do see some nice sunsets, but my particular view is also pretty much obscured by trees, houses, and in my case part of the Niagara Escarpment. I also have the balcony of the apartment above mine right above mine, which means I can’t put a telescope on the balcony and see the zenith – straight up.
It’s also taken my a while to work out the geometry of the building. From the farthest out I can put a telescope on my balcony, Polaris just peeks over the top of the building, in the direction of a flood light that shines down on our parking area, which means that it’s virtually impossible to get a good polar alignment optically.
Not exactly a dark sky area.
Still, the urge to observe and photograph is strong, and a few things are amenable to urban star watchers even under less than ideal circumstances. The first thing is the moon. While nothing will move clouds out of the way, even in the most light-polluted areas the moon is still a great view. on a clear night Jupiter, Mars, Saturn, and Venus are all observable from cities too. They are so bright in comparison to stars and deep sky objects like galaxies and nebulae that there’s enough contrast to see them pretty well. Even the Galilean moons of Jupiter are pretty reliable from urban vantage.
My particular balcony’s situation means that in late winter evening views bring the Constellation Orion into view. Right now, Jupiter isn’t far off of Orion, and once a month the moon makes an appearance in the area, too. I was pretty happy, therefore, to see a clear evening on Sunday 17 March 2013 – and all three swung into view.

The Constellation Orion and the moon presented a lovely view from my apartment in Hamilton on 17 March 2013.
The sky around Orion is particularly rich in interesting objects, and it’s one of my favourite parts of the sky. As soon as I could get a clear view of the area from Orion to the Pleiades, just to the east of Orion and past the moon, I set up a camera and took some overall photos with a wide-angle lens. The brightest individual objects in the sky were the moon and Jupiter, very near by. These two bright objects were great to capture with a telephoto lens.

The moon and Jupiter passed within three degrees of each other on the evening of 17 March 2013. The view with a 500 mm telephoto lens and camera on a tripod.
After a few photos of the overall scene I concentrated on the moon for a bit. Actually, this is a bit of a literary slight-of-hand, because I’d been preparing to use a telescope for a little while on the 17th, and had set up my big EQ6Pro telescope mount ahead of time. I settled on an approximate alignment to Polaris as “close enough for apartment work” and then mounted my old 80 mm f/15 refracting telescope on the mount. With a focal length of 1,500 mm this long white telescope gives nice views of the moon. I took a few shots at 1/100 of a second, ISO 400.

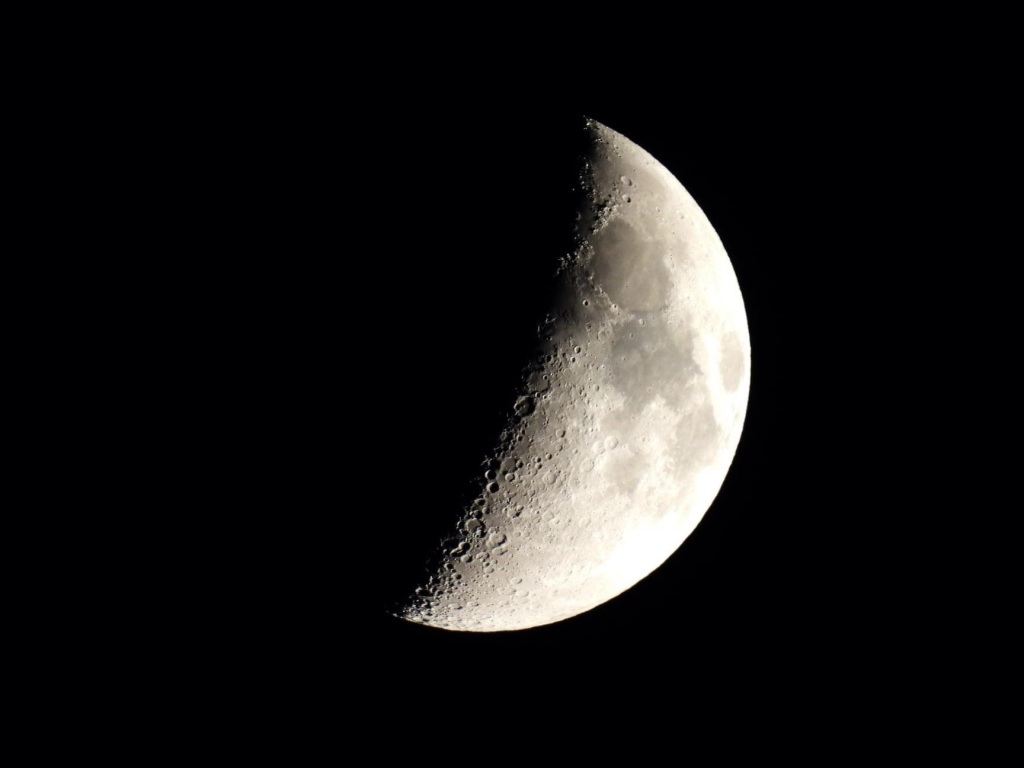
The moon, photographed on 17 March 2013 from an apartment balcony in Hamilton, Ontario, with an 80 mm f/15 refracting telescope and Nikon D800 camera.
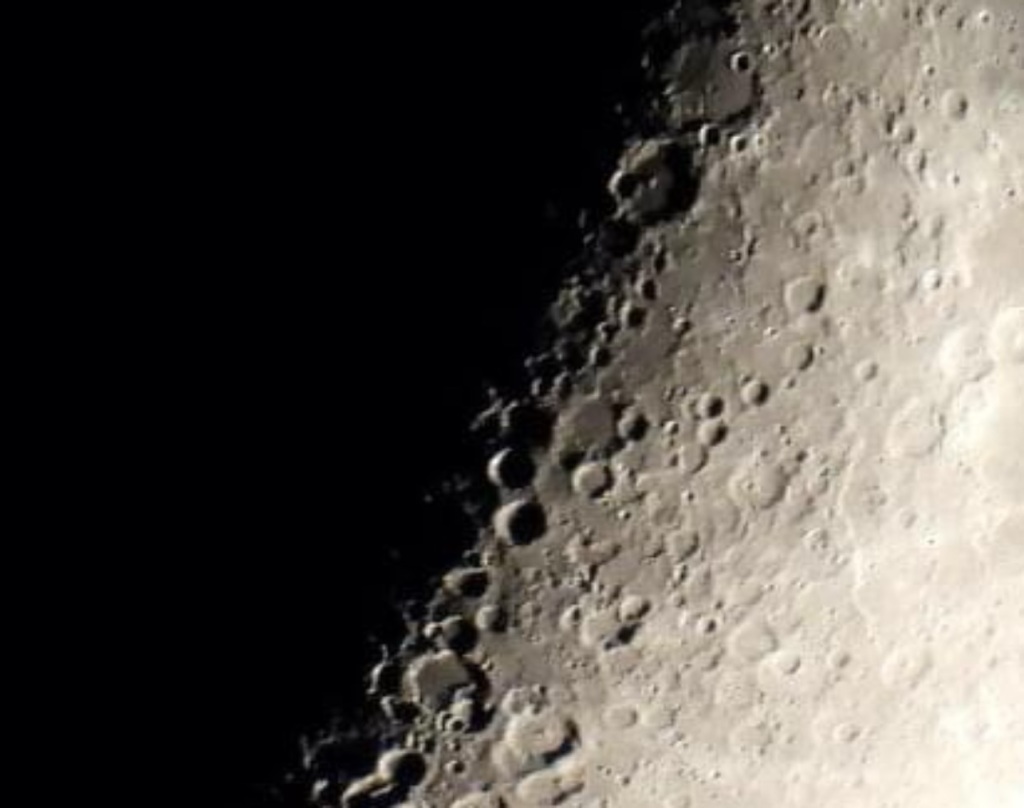
The view of the moon was nice on the 17th. The terminator was passing through the Sea of Tranquility, meaning that the landing site of the 1969 Apollo 11 mission was likely just experiencing sunrise. Crater Theophilus, one of my favourites, was nicely illuminated. The image above is the whole image, reduced in resolution. Below is a section centred near Theophilus cropped but not reduced in resolution. The Apollo 11 landing site was approximately in the middle of this view left to right, and just below the top edge of the frame.

A portion of the photo of the moon above, taken on 17 March 2013, unreduced in resolution. Crater Theophilus is near the middle of this view, with a four-peaked mountain in its centre, just caught by the morning rays of the sun.
Once I had my fill of the moon I decided to go after a deep sky prize for the first time: the Great Nebula in Orion, or M42. This is an amazing region of space, about 1000 light-years away, where new stars are being born in huge clouds of gas and dust. We can see this nebula (Latin for cloud) with our own eyes on a clear night. It’s the middle “star” in the “sword” hanging down from Orion’s belt. It’s even visible on the wide-angle photo at the beginning of this post, looking like a star.
The EQ6Pro mount I was using is equipped with a digital inventor of many objects in the sky. I simply entered “M42” in the keypad and the mount took over, pointing the telescope right at the nebula! I took a few photos right away. My biggest challenge was focusing the telescope. I was not able to see any stars at all through the camera viewfinder. I took a series of exposures, adjusting focus between each one. I was really happy to see something of the nebula, though. The photo below was among the better of the group, taken with the Nikon D800 at ISO 6400, 15 second exposure.

My first photo of th Great Nebula in Orion – M42. The good news? Lots of room for improvement.
One of the cardinal rules in using a telescope, especially for photography, is that it’s best if the telescope itself is at the same temperature as the air. When I started my March 17 observing I set out a larger telescope, a Sky-Watcher 200 mm f/5 Newtonian reflector (focal length 1000 mm, designed for imaging), on the balcony to cool down. By the time I was ready to try something more challenging than the moon, it was ready. I set this larger scope onto the mount and re-aligned it. What a difference! The larger diameter of this telescope – 200 mm compared to 80 mm for the refractor – gathers a lot more light. With the camera on live-view I was immediately able to see the four central stars in the nebula, known as the Trapezium, and focus the telescope on them. After experimenting with exposures I settled on ISO 640 and 30 seconds, and was quietly pleased with the results. This is just a first stab at a “deep sky object” for me, but it looks promising, especially for those times to come when I will be able to align the mount a little better (eliminating the slight streaking of the stars into trails visible here), and get out of areas of intense light pollution (which improves contrast and detail in astrophotography).

The Great Nebula in Orion photographed with a 200mm Newtonian Telescope, 17 March 2013, from an apartment balcony in Hamilton, Ontario.
The relative sizes of the images I’ve presented here are a little misleading. The nebula is about a degree across in the sky, compared to half a degree for the moon. Much less detail came through on M42 because the moon is so much brighter that it shone through the sky glow of urban light pollution, and because among other things it required a much shorter exposure. Also, the 80 mm refractor has a focal length of 1500 mm, while the much beefier-looking Newtonian is just 1000 mm. Like camera lenses, this means that the refractor actually magnifies things more than the Newtonian does, and I used the refractor for the images of the moon. It’s also worth noting that having the moon so close to Orion on the 17th made photography of the nebula even harder. Its bright light spills all over the sky, and even into the telescope, reducing usable contrast on the nebula.
Copyright © David Allan Galbraith 2013